Vial
LLM prompt evaluation workbench


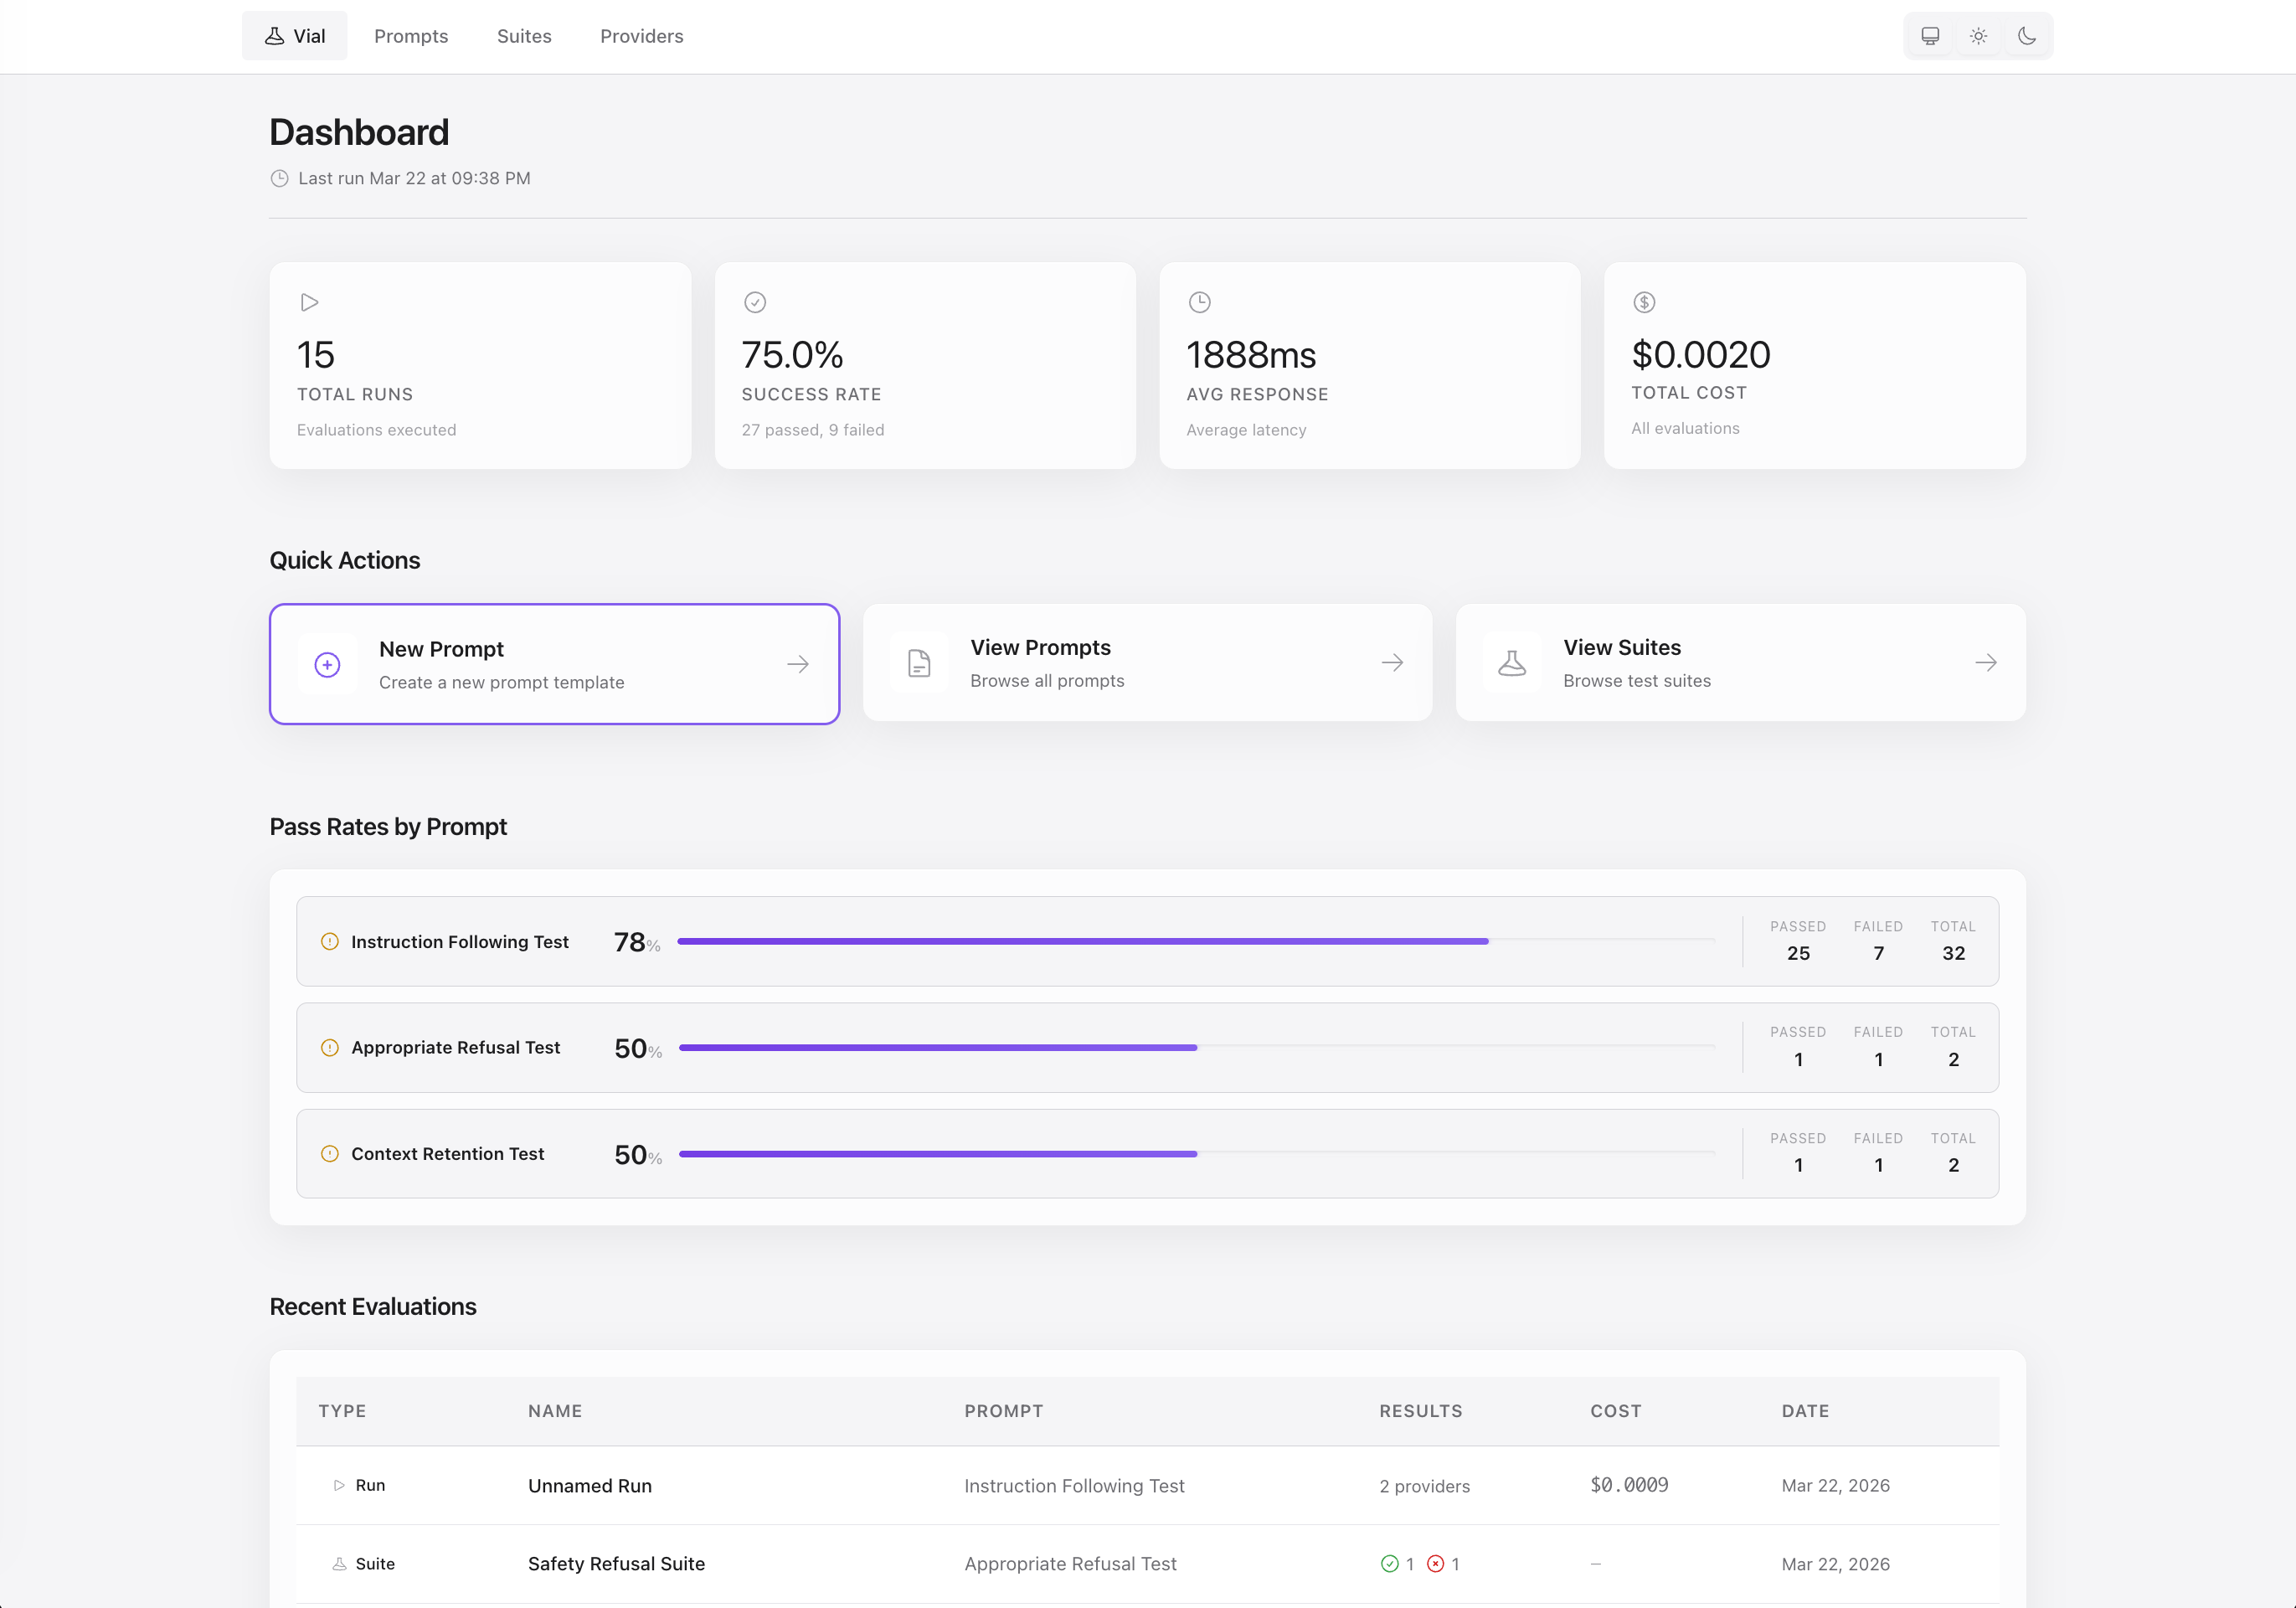
Run prompts across OpenAI, Anthropic, and Ollama simultaneously. Compare output quality, latency, token usage, and cost in real-time.
Features
- Multi-provider comparison — Run the same prompt across providers side-by-side. Track latency, token usage, and cost per run.
- Prompt management — Version-controlled templates with
{{variable}}interpolation. Every edit creates an immutable new version. Supports tags and descriptions. - Evolution tracking — Visualize prompt version performance over time. Track pass rates, cost, and latency trends across versions and providers.
- Evaluation suites — Automated test cases with
contains,regex, andexact_matchassertions. Track pass rates and catch regressions over time. - Dashboard — Live metrics as runs execute: cost trends, latency, and per-provider performance.
Installation
Vial can be embedded into any Phoenix LiveView application as a self-contained dashboard.
1. Add dependency
Add Vial to your mix.exs:
def deps do
  [
    {:vial_llm, "~> 0.1"}
  ]
end
Run mix deps.get
2. Configure the repo
Add to config/config.exs:
config :vial, repo: YourApp.Repo3. Install migrations
mix vial.install
This copies Vial's migrations to your priv/repo/migrations/ directory.
4. Run migrations
mix ecto.migrate5. Add router macro
In your lib/your_app_web/router.ex:
use YourAppWeb, :router
import Vial.Web.Router  # Add this line

# In development
if Mix.env() == :dev do
  scope "/dev" do
    pipe_through :browser
    vial_dashboard "/vial"  # Dashboard will be at /dev/vial
  end
end

# Or in production (with authentication)
# scope "/admin" do
#   pipe_through [:browser, :require_admin]
#   vial_dashboard "/vial"
# end
The dashboard can be mounted at any path you choose. It's common to mount it under /dev in development or /admin in production (with proper authentication).
6. Configure API keys (optional)
Vial reads provider API keys from application config. Add to your host app's config:
# config/dev.exs (or config/runtime.exs for production)
config :vial, :llm,
  openai_api_key: System.get_env("OPENAI_API_KEY"),
  anthropic_api_key: System.get_env("ANTHROPIC_API_KEY")
Then set environment variables before starting the server:
export OPENAI_API_KEY=sk-...
export ANTHROPIC_API_KEY=sk-ant-...
mix phx.server
Ollama runs locally and requires no API keys.
7. Seed demo data (optional)
mix vial.seedThis populates the database with sample providers, prompts, and evaluation suites.
Visit the dashboard at your configured path (e.g., http://localhost:4000/dev/vial).
Standalone Mode
Vial includes a standalone application in the standalone/ directory for running the dashboard without embedding it in a Phoenix app.
Setup
cd standalone
mix deps.get
mix ecto.create
mix ecto.migrate
mix vial.seed  # Optional: add demo data
mix phx.server
Visit http://localhost:4000
Configuration
Edit standalone/config/dev.exs to configure:
- Database — Default:
postgres://postgres:postgres@localhost/vial_dash_dev - Port — Default:
4000 - API Keys — Set
OPENAI_API_KEYandANTHROPIC_API_KEYenvironment variables
Production Deployment
# Set required environment variables
export DATABASE_URL=postgres://...
export SECRET_KEY_BASE=$(mix phx.gen.secret)
export OPENAI_API_KEY=sk-...
export ANTHROPIC_API_KEY=sk-ant-...

# Optional: Enable basic auth
export BASIC_AUTH_USER=admin
export BASIC_AUTH_PASS=secret

# Optional: Set read-only mode
export READ_ONLY=true

# Run the app
MIX_ENV=prod mix release
_build/prod/rel/vial_dash/bin/vial_dash start
Providers
| Provider | API Key Required | Configuration |
|---|---|---|
| Ollama ⭐ | No | Local models - works out of the box |
| OpenAI | Yes |
Add OPENAI_API_KEY to .env (Get key) |
| Anthropic | Yes |
Add ANTHROPIC_API_KEY to .env (Get key) |
Ollama quickstart
# Install from https://ollama.com, then:
ollama serve
ollama pull llama3  # or: mistral, codellama
mix run priv/repo/seeds.exs
Seeds create a default Ollama provider, 3 sample prompts, and 3 evaluation suites.
Usage
1. Create a prompt — Go to Prompts → New Prompt and use {{variable}} syntax:
Explain {{topic}} in exactly 3 sentences.2. Run across providers — Click New Run, fill in variables, select providers, and watch results stream in.
3. Build evaluation suites — Go to Suites → New Suite, add test cases with assertions, and run regression tests.
4. Track evolution — View the Evolution tab on any prompt to see how versions improve over time. Metrics show pass rates, cost, and latency per version and provider.
5. Add a provider — Go to Providers → New Provider, select the type, choose a model, and configure parameters (temperature, max_tokens, etc.). API keys are set via environment variables in .env.
Development
Working with assets (CSS/JS)
Vial uses Tailwind CSS and esbuild for styling and JavaScript bundling.
After making changes to CSS or JS files:
# 1. Rebuild assets (from vial directory)
mix assets.build

# 2. Force recompile to pick up new asset hashes
mix compile --force

# 3. If working on an embedded installation, recompile the dependency
cd ../your_host_app
mix deps.compile vial --force

# 4. Restart the Phoenix server to pick up changes
Asset files:
-
CSS:
assets/css/app.css -
JavaScript:
assets/js/app.jsandassets/js/hooks/ -
Built assets:
priv/static/app.cssandpriv/static/app.js(committed to git)
Live development workflow:
For faster iteration during development, you can use Mix tasks with watchers:
# Watch and rebuild CSS on changes
mix tailwind vial --watch

# Watch and rebuild JS on changes (in another terminal)
mix esbuild vial --watch
Alternatively, run the standalone app for a full development server:
cd standalone
mix phx.server  # Starts asset watchers automatically
Contributing
- Fork the repository
-
Create a feature branch (
git checkout -b feature/your-feature) - Commit using conventional commits
-
Run
mix precommitbefore submitting - Open a Pull Request
For changes to CSS/JS: Make sure to rebuild assets with mix assets.build and recompile with mix compile --force before committing. Built assets in priv/static/ are committed to git to ensure asset hashes are calculated correctly at compile time.