Why? 🤷
Following
Google
and
Github
it made sense for us
to add “Sign-in with Microsoft“. <br />
This is the package
we wished already existed.
Now it does!
What? 💭
An Elixir package that seamlessly handles
Microsoft OAuth2 Authentication/Authorization
in the fewest steps. <br />
Following best practices for security & privacy
and avoiding complexity
by having sensible defaults for all settings.
We built a lightweight solution that does one thing and is easy for complete beginners to understand/use. <br /> There were already a few available options for adding Microsoft Auth on hex.pm/packages?search=microsoft. Most of these are not specific to Azure AD or build upon other auth packages that have much more implementation steps and complexity. Complexity == Cost. 💸 Both to onboard new devs and maintain your app when there are updates. </br> This package is the simplest implementation we could conceive. It has bothstep-by-step setup instructions and a complete working example
PhoenixApp. See: /demo
Who? 👥
This package is for people building apps
with Elixir / Phoenix
who want to add “Sign-in with Microsoft“
much faster
and more maintainably.
It’s targetted at complete beginners with no prior experience/knowledge of auth “schemes” or “strategies”. <br /> Just follow the detailed instructions and you’ll be up-and running in a few minutes minutes.
How? ✅
You can add Microsoft Authentication to your Elixir App
using elixir_auth_microsoft <br />
in under 5 minutes the following steps.
1. Add the hex package to deps 📦
Open your project’s mix.exs file
and locate the deps (dependencies) section. <br />
Add a line for :elixir_auth_microsoft in the deps list:
def deps do
  [
    {:elixir_auth_microsoft, "~> 1.0.0"}
  ]
end
Once you have added the line to your mix.exs,
remember to run the mix deps.get command
in your terminal
to download the dependencies.
2. Create an App Registration in Azure Active Directory 🆕
Create an App in Azure Active Directory if you already don’t have one. <br/> You need this to generate OAuth2 credentials for the appication.
The Azure AD credentials can either be saved as environment variables or stored in a config file if you prefer.
Note: There are a few steps for creating your Azure App Registration and respective credentials. <br /> We created the following
azure_app_registration_guide.mdto make it quick and painless.<br /> Don’t be intimidated by all the buzz-words; it’s quite straightforward. <br /> Once you have followed the instructions in the guide you will have the two secrets you need to proceed. <br /> If you get stuck, get help by opening an issue on GitHub! <br />
3. Export Environment / Application Variables
You may either export these as environment variables or store them as application secrets:
e.g:
export MICROSOFT_CLIENT_SECRET=rDq8Q~.uc-237FryAt-lGu7G1sQkKR
export MICROSOFT_CLIENT_ID=85228de4-cf4f-4249-ae05-247365
export MICROSOFT_SCOPES_LIST=openid profile Note: These keys aren’t valid, they are just for illustration purposes.
alternatively add the following lines to your
config/runtime.exs file:
config :elixir_auth_microsoft,
  client_id: "00c63f7-6da6-43bd-a94f-74d36486264a",
  client_secret: "paX8Q~_SRO9~UScMi4GTyw.oC8U_De.MiqDX~dBO"
  scopes: "openid profile"
See: https://hexdocs.pm/phoenix/deployment.html#handling-of-your-application-secrets
The MICROSOFT_SCOPES_LIST or scopes are optional,
and they default to the user profile. <br />
For the scopes available, see:
learn.microsoft.com/en-us/azure/active-directory/develop/v2-permissions-and-consent
Remember that the scopes you request
are only given permission dependending
on what you set in the App Registration
in Azure Active Directory.
Find more information in the
azure_app_registration_guide.md
4. Add a “Sign in with Microsoft” Button to your App
Add a “Sign in with Microsoft” to the template where you want to display it:
<a href={@oauth_microsoft_url}>
  <img src="https://learn.microsoft.com/en-us/azure/active-directory/develop/media/howto-add-branding-in-azure-ad-apps/ms-symbollockup_signin_light.png" alt="Sign in with Microsoft" />
</a>
To enable this button you need to
generate the valid signin URL in the controller
that is responsible for this page
using
ElixirAuthMicrosoft.generate_oauth_url_authorize/2
e.g:
def index(conn, _params) do
  oauth_microsoft_url = ElixirAuthMicrosoft.generate_oauth_url_authorize(conn, "random_uuid_here")
  render(conn, "index.html",[oauth_microsoft_url: oauth_microsoft_url])
endNote: this is covered in the /demo/README.md.
5. Use the Built-in Functions to Authenticate People :shipit:
Once you have the necessary environment or config variables
in your Elixir/Phoenix App,
use the
ElixirAuthMicrosoft.get_token/2
and
ElixirAuthMicrosoft.get_user_profile
functions to handle authentication.
Sample controller code:
defmodule AppWeb.MicrosoftAuthController do
  use AppWeb, :controller

  @doc """
  `index/2` handles the callback from Google Auth API redirect.
  """
  def index(conn, %{"code" => code, "state" => state}) do

    # Perform state change here (to prevent CSRF)
    if state !== "random_state_uid" do
      # error handling
    end

    {:ok, token} = ElixirAuthMicrosoft.get_token(code, conn)
    {:ok, profile} = ElixirAuthMicrosoft.get_user_profile(token.access_token)

    conn
    |> put_view(AppWeb.PageView)
    |> render(:welcome, profile: profile)
  end
end
The exact controller code implementation is up to you, but we have provided a working example.
6. Add the /auth/microsoft/callback to router.ex
Open your lib/app_web/router.ex file
and locate the section that looks like scope "/", AppWeb do
Add the following line:
get "/auth/microsoft/callback", MicrosoftAuthController, :indexWith all that hooked up you should now have everything working.
Done! 🎉
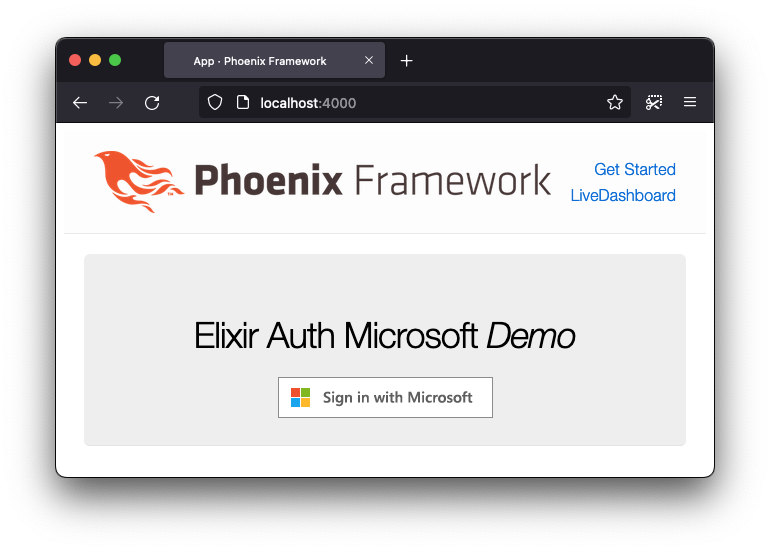
The home page of the app should now have a big “Sign in with Microsoft” button:
When the person clicks the “Sign in with Microsoft“ button, they should be prompted with the Microsoft Sign-in page:
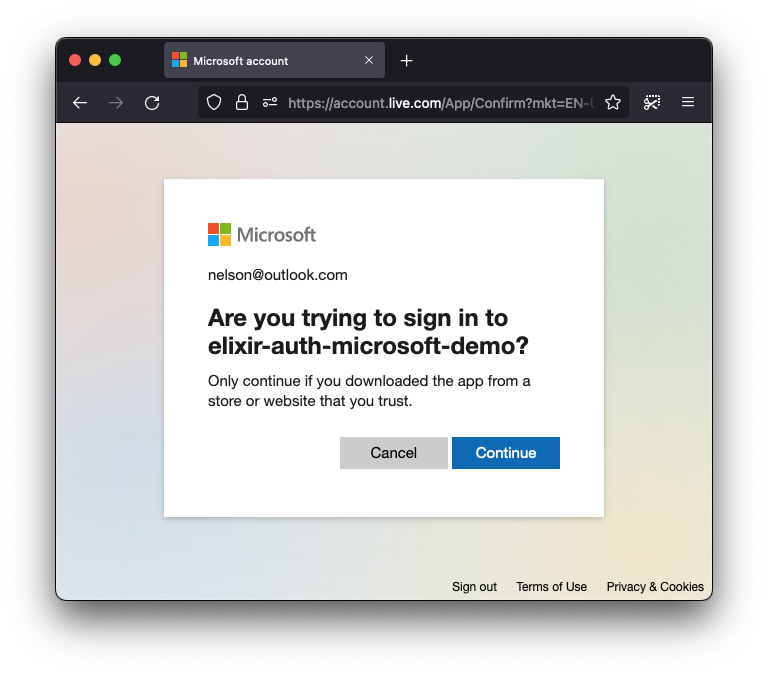
This makes it clear what App they are authenticating with,
in our case elixir-auth-microsoft-demo
(your app will be whatever you called it!)
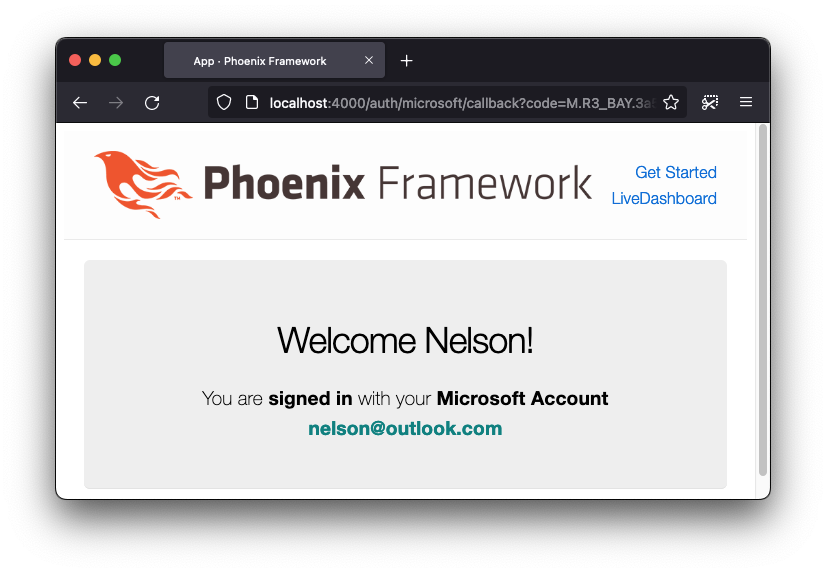
The person will then have to consent to the defined scopes in the App Registration alongside the overlap of the scope(s) requested.
After this, they will be shown the following page after successful login:
That’s it! You can chose to do whatever you want after this point. If you have any questions or get stuck, please open an issue. 💬
If you find this package/repo useful, please star on GitHub, so that we know! ⭐
Thank you! 🙏
Complete Working Demo / Example Phoenix App 🚀
If you get stuck
or need a more in-depth / real-world implementation,
we’ve created a guide that takes you step-by-step
through creating a Phoenix app with
Microsoft authentication.
Please see: /demo/README.md.
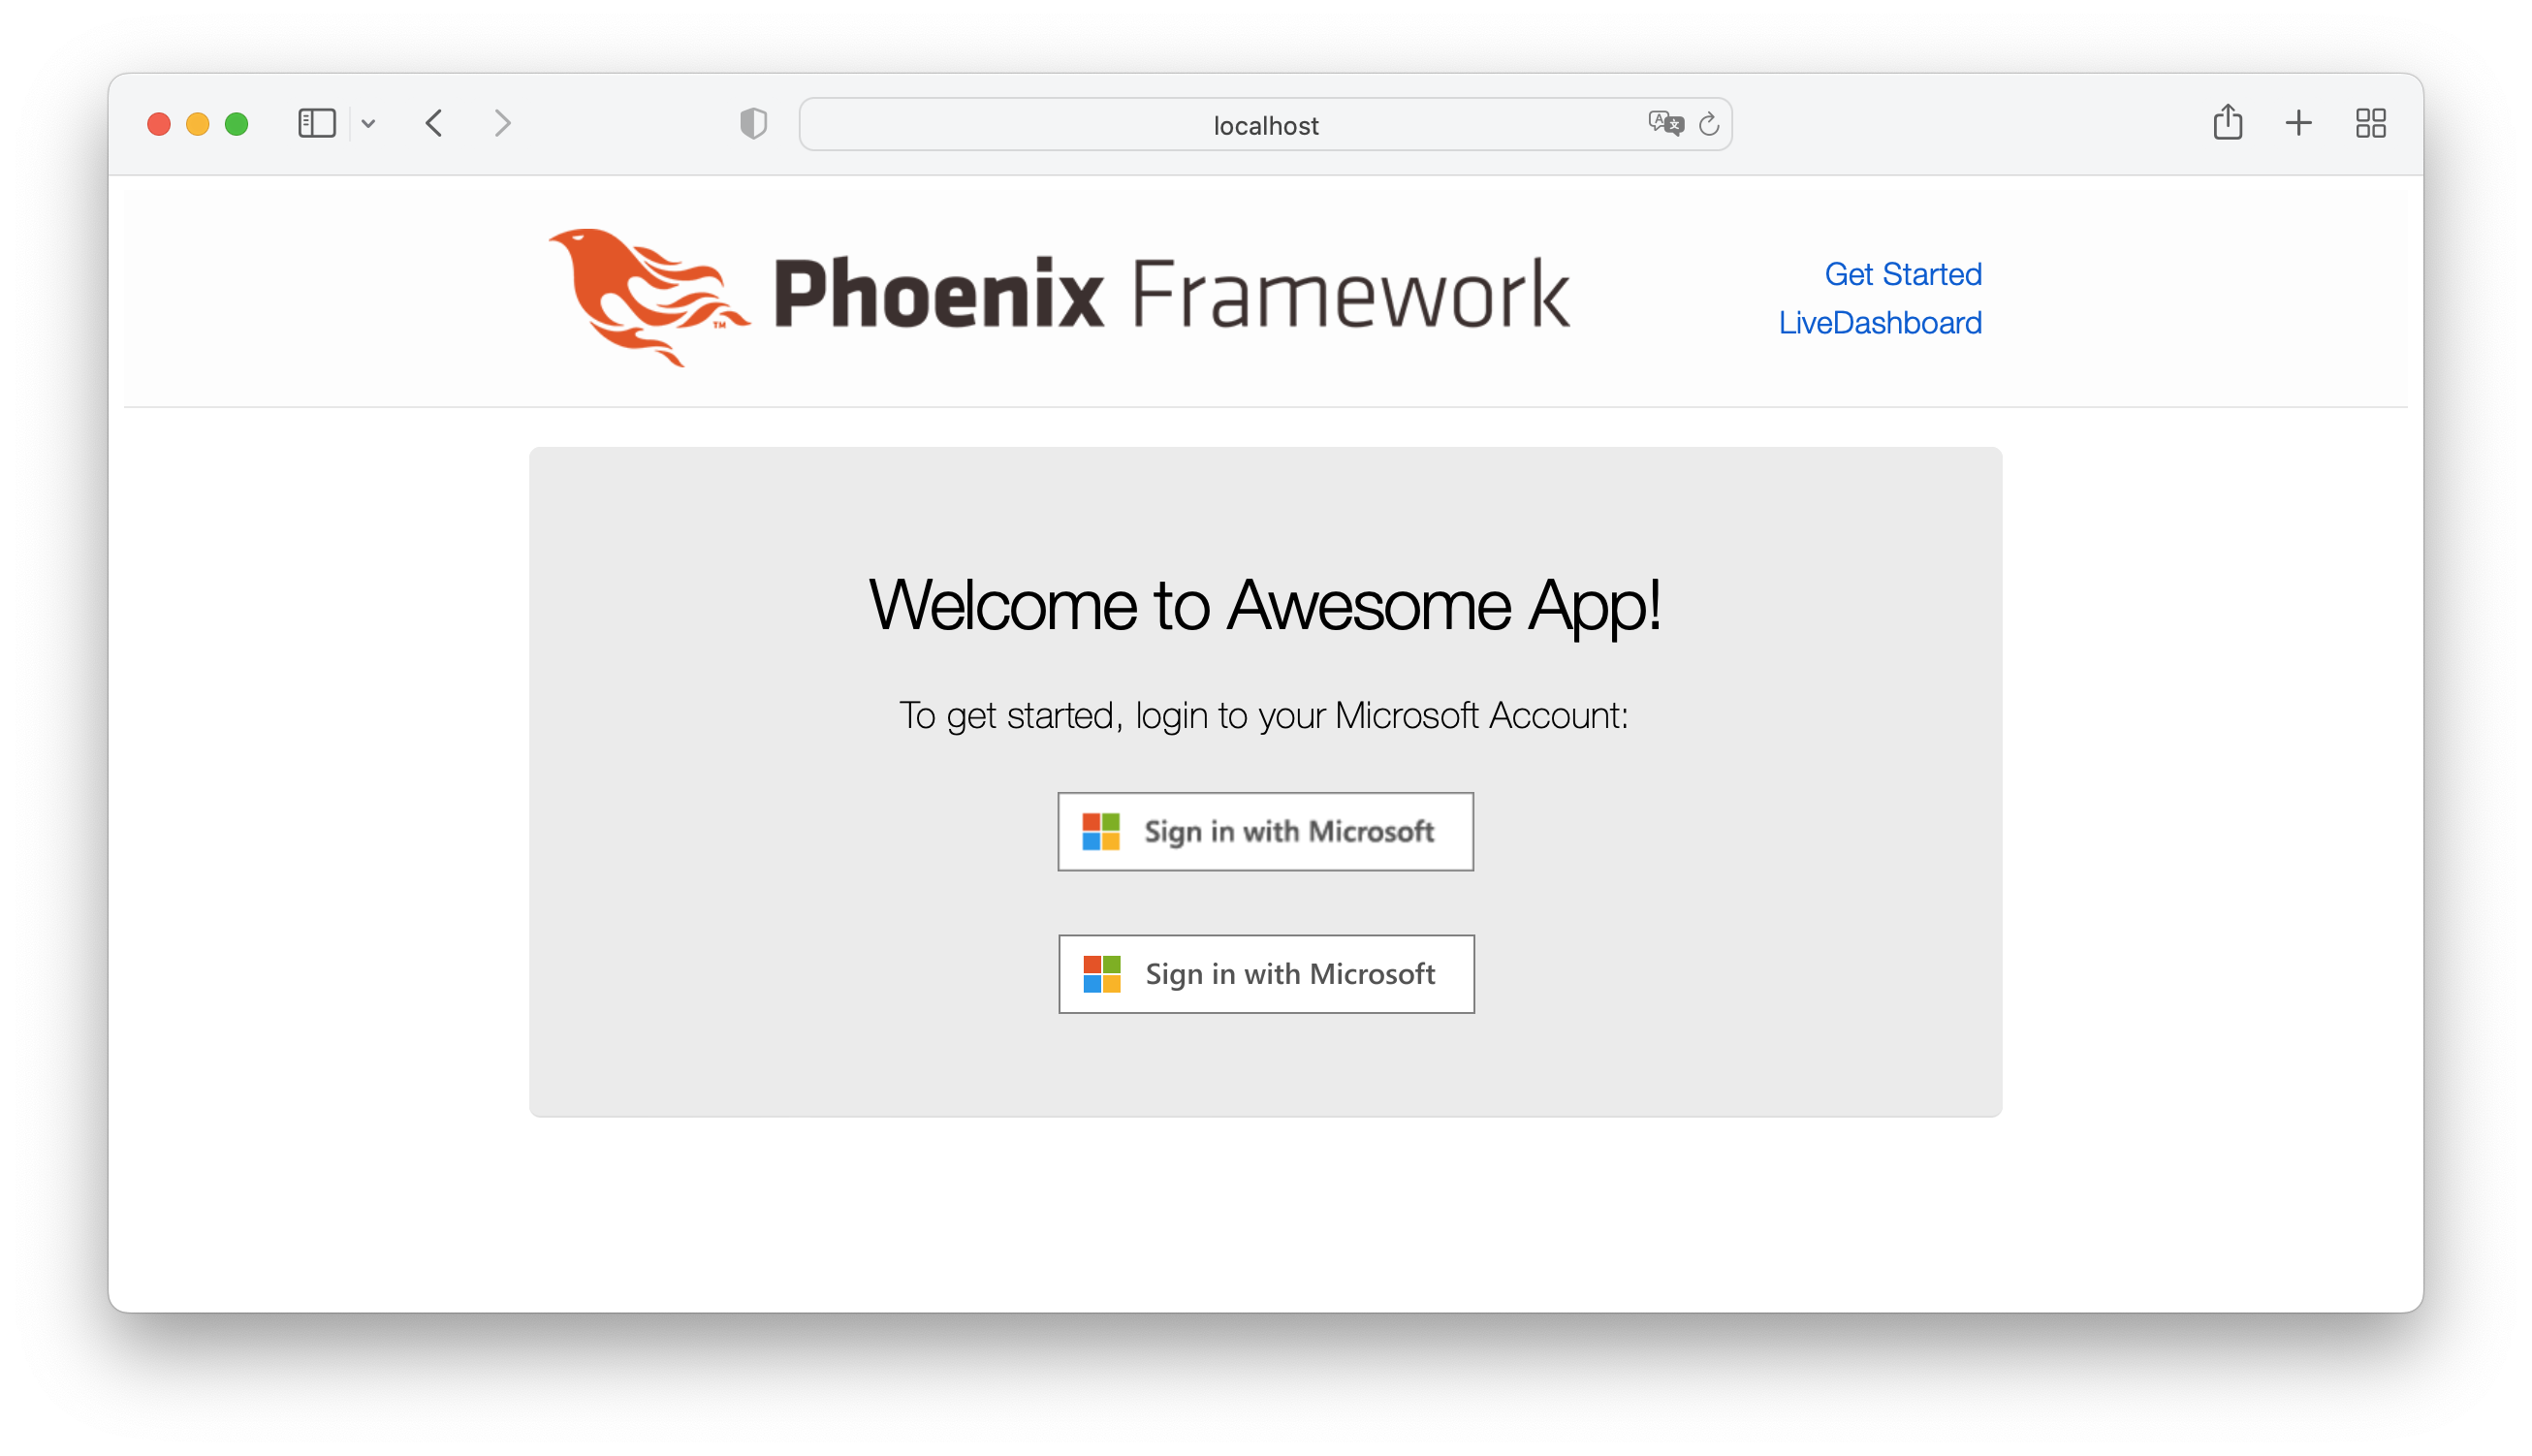
Optimised SVG + CSS Button
If you inspect our demo app,
you might have realised we are using an <img> for the
Sign in with Microsoft button.
However, we could go for an alternative and have a svg
file, making it more lightweight and allowing us to even
change languages if we wanted to!
Luckily, Microsoft has made all the heavylifting for us. If we follow this link, we’ll find a few options and themes on SVG format.
The result looks better than the <img> button.
Here’s a comparison between the two:
Notes 📝
- Azure AD official docs: https://learn.microsoft.com/en-us/azure/active-directory/
- Azure Authentication Flow used: https://learn.microsoft.com/en-us/azure/active-directory/develop/v2-oauth2-auth-code-flow#use-the-access-token
Branding Guidelines
The official Microsoft Auth branding guidelines specify exact button, font and spacing: https://learn.microsoft.com/en-us/azure/active-directory/develop/howto-add-branding-in-azure-ad-apps
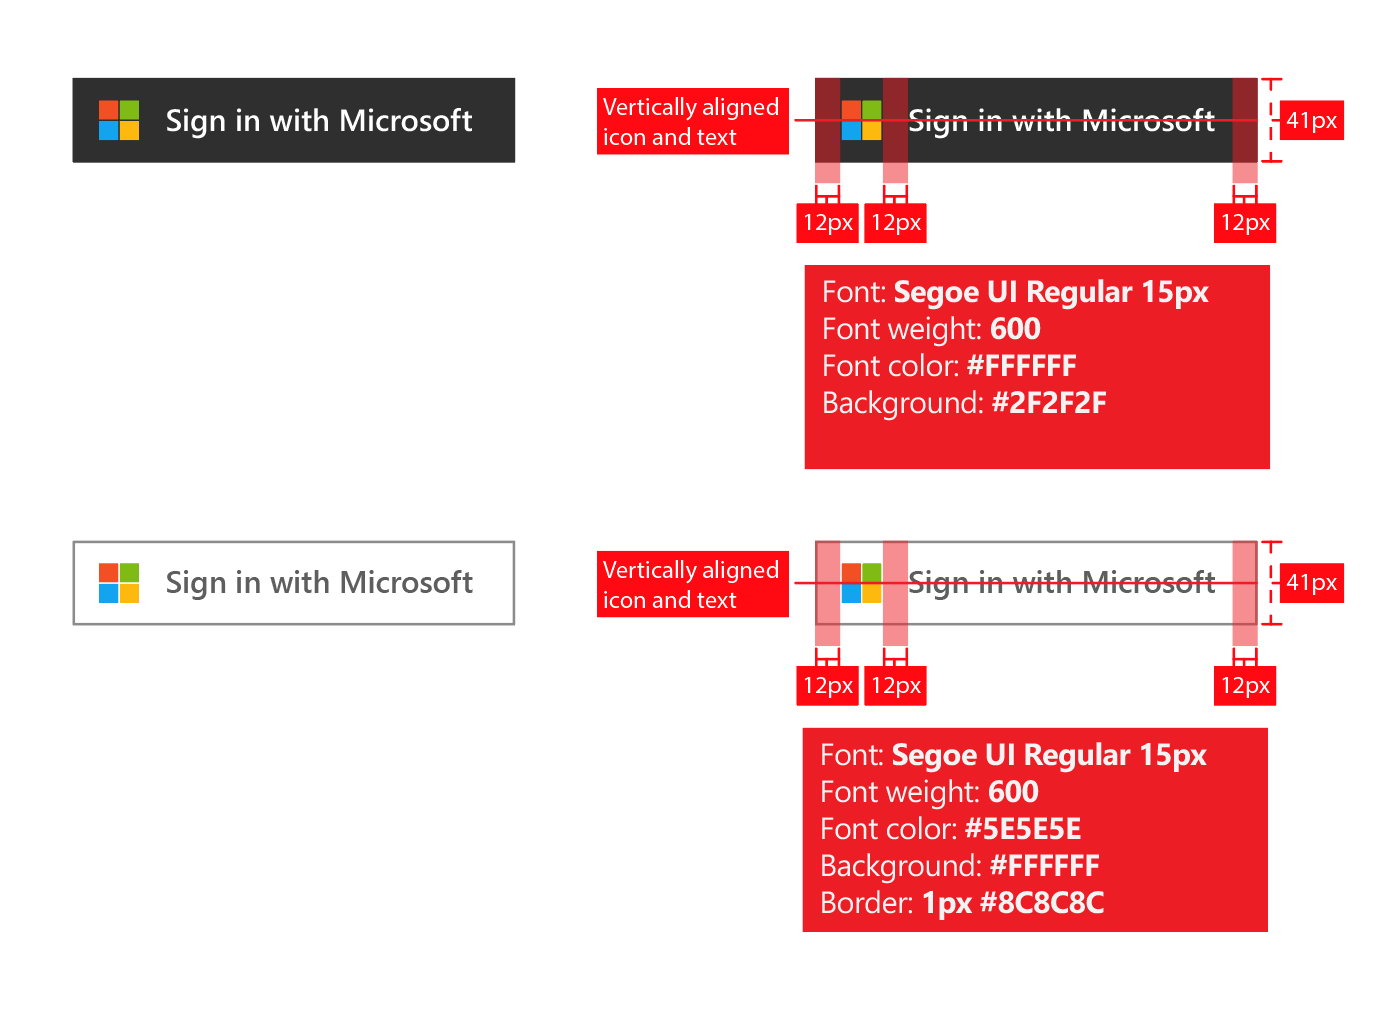
We have followed them precisely in our implementation.