Auto Doc: Effortless OpenApiSpex Documentation
Welcome to Auto Doc, your ultimate solution for generating comprehensive OpenApiSpex documentation in minutes!
With Auto Doc, gone are the days of spending endless hours crafting API documentation. Simply adhere to our standardized directory hierarchy and naming conventions within your project, and let Auto Doc handle the rest.
Key Features:
- Lightning-fast Documentation: Generate almost complete OpenApiSpex documentation in just a couple of minutes.
- MacOS Compatibility: Auto Doc is fully compatible with MacOS. While it hasn't been tested on Windows yet, rest assured, we're working on it!
- Seamless Integration: Easily integrate Auto Doc into your workflow via its intuitive API.
- Subscription-based Service: Enjoy the convenience of a subscription-based microservice, offering you a solid foundation for writing professional API Docs while saving you valuable time and resources, all for less than the cost of an hour's work (10€) per month.
- Upgrade your API documentation experience with Auto Doc today and witness unparalleled efficiency and professionalism in your projects.
Installation
Add the following dependencies to mix.exs file deps/0 function.
Note: We'll need Jason and HTTPoison to format the data and do the API calls.
{:jason, "~> 1.2"},
{:httpoison, "~> 2.0"},
{:auto_doc_package, git: "https://github.com/zen-dev-lab/auto_doc_package"}
Registration
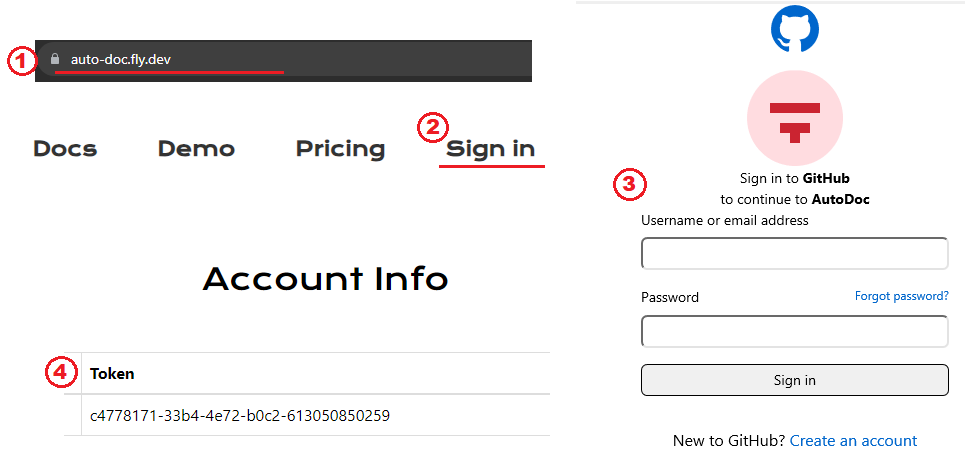
- Go to auto-doc.fly.dev
- Click Sign in
- Register via Github OAuth
-
Being forwarded to your dashboard page where a personal user
tokencan be seen(important for later)
Personal Github Access Token
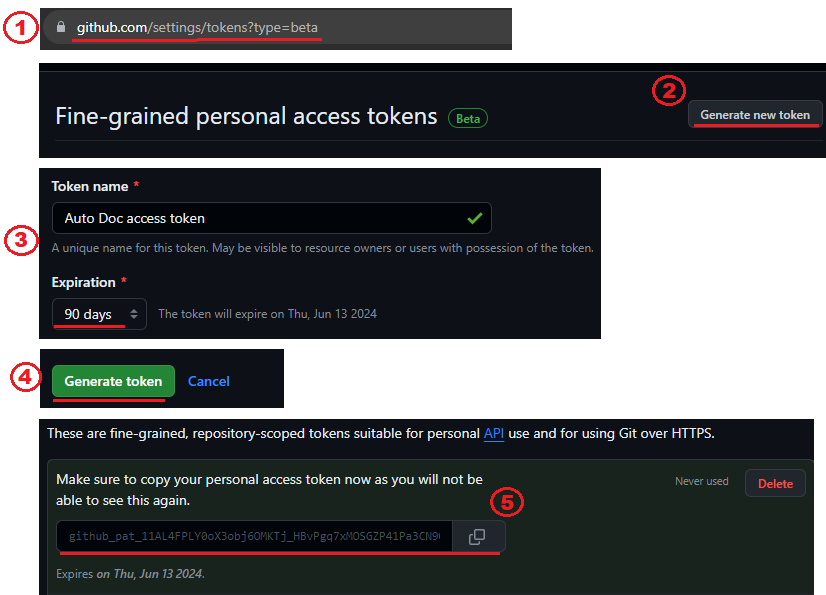
For Authorizing API calls to Auto Doc, you'll need a personal access token.
-
Navigate to
settings/tokenspage here - Click Generate new token
- Give it some name and set your expiration date to 90 days or more
- Click Generate token
- Copy your personal access token (important in for the next step)
Setup ENV Variables
In your .env file, add the following ENV Variables:
# The Token shown in your Dashboard
export AUTO_DOC_USER_TOKEN="your-user-token-here"
# The Github Access Token we just created in the previous step
export GITHUB_ACCESS_TOKEN="your-access-token-here"
To apply the changes done to the file, run the following command in your IDE terminal:
source .envThat's it! You can now use the package and API. 🙌
AutoDocPackage usage
First, start your Interactive Elixir shell by running the following command in your IDE's terminal
iex -S mixThen, we need to pick the documentation directory and the controller to create OpenApiSpex docs for.
Copy the relative paths to both the directory and the controller file and assign them to variables.
documentation_path = "auto_doc/lib/auto_doc_web/documentation"
controller_path = "auto_doc/lib/auto_doc_web/controllers/users/user_controller.ex"
Now, execute the function written below
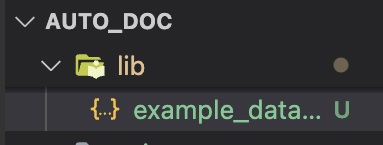
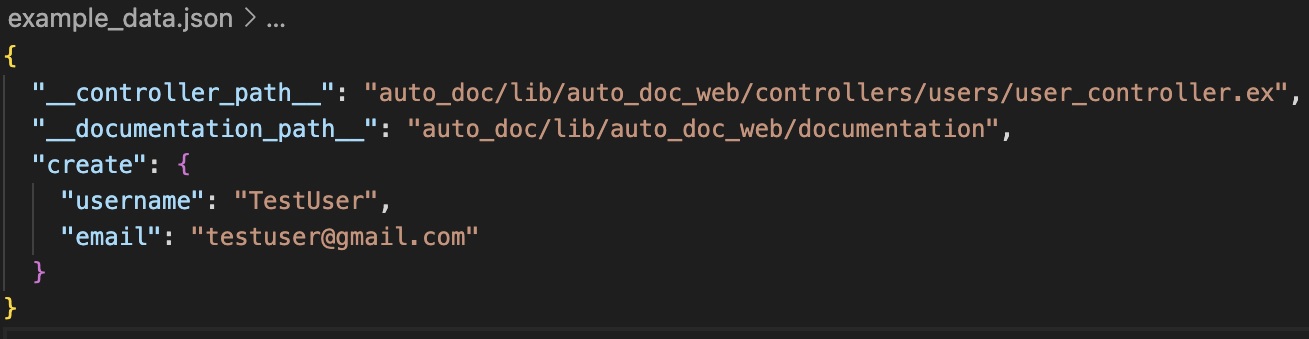
AutoDocPackage.Requests.gen_example_data_file(documentation_path, controller_path)Notice that under the
lib/directory a new file with the nameexample_data.jsonhas been created.Open it and check its content.
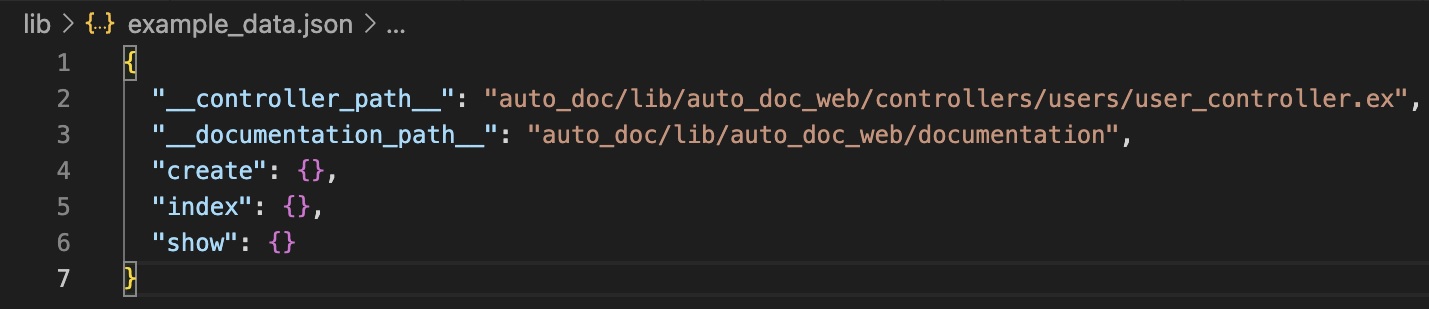
It contains two types of keys:
special keys(start and end with
__) which musn't be edited.operation keys(each key corresponds to a new undocumented action in your controller)
With the
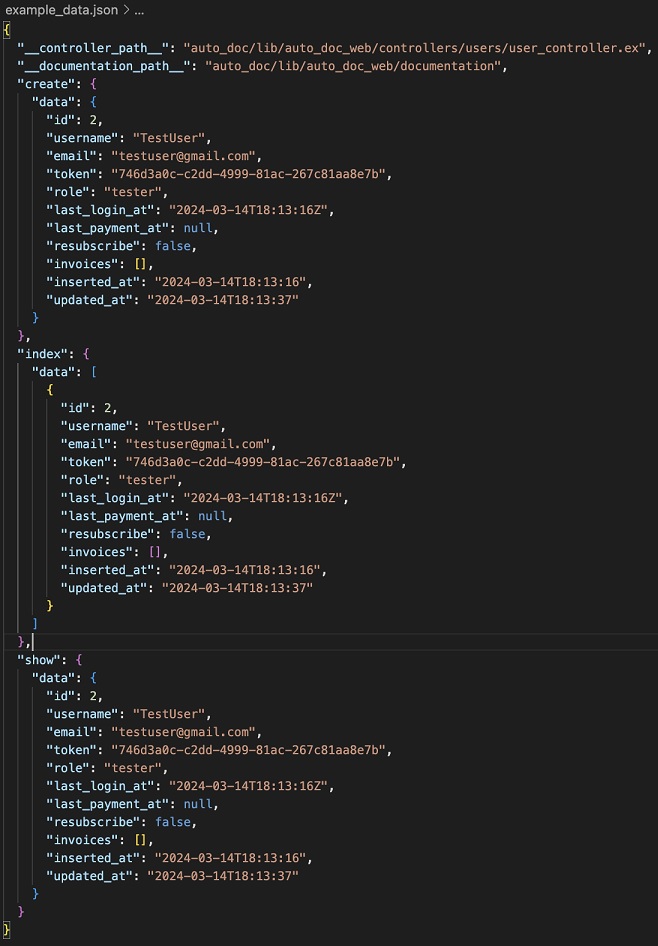
example_data.jsonfile present, what's left to do is add the params/response payloads for each action key and then run thegen_api_spex/1commmand with the corresponding argument.There are three possible arguments for that command
:paramsor"params"-> states that params payloads have been passed and should create the new Params modules:responseor"response"-> states that response payloads have been passed and should create the new Response modules:operationsor"operations"-> states that the new Params/Response modules have been created and should add the new operation functions (and their aliases)
Generate response modules
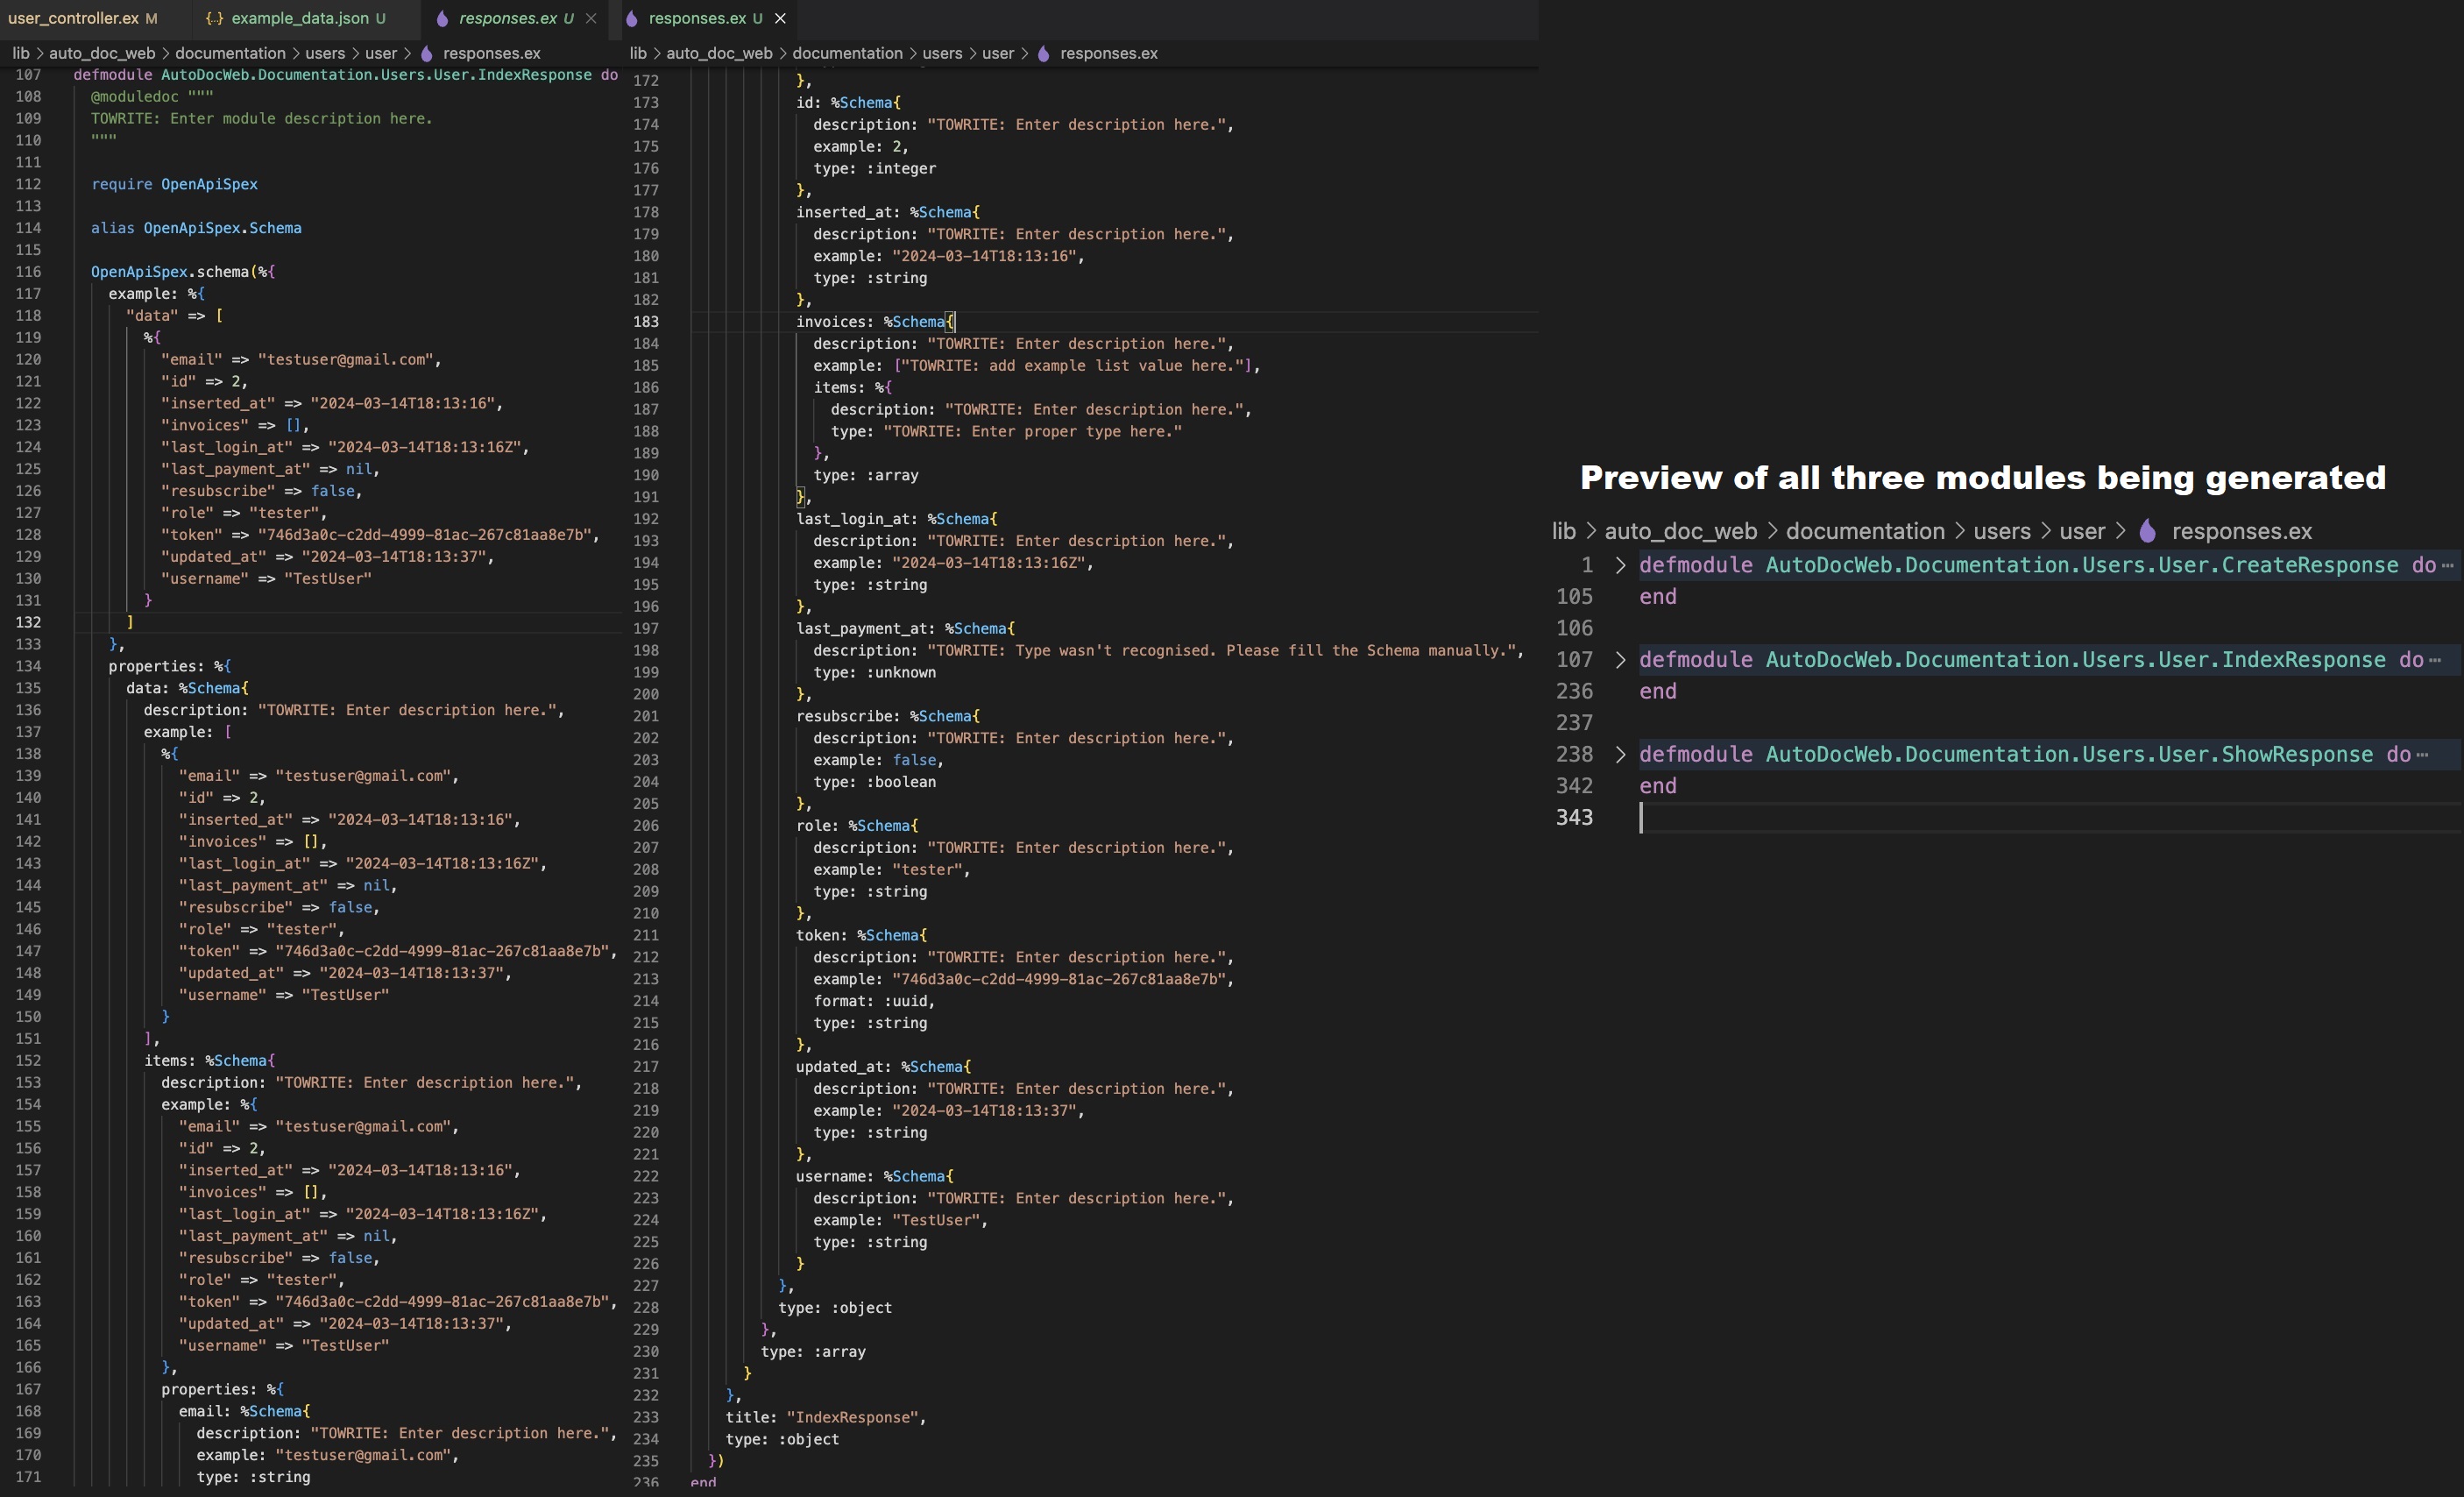
Pass the response payloads as described earlier and run
AutoDocPackage.Requests.gen_api_spex(:response)Then, your
response.exfile will be generated or the new modules will be appended to the existing file. (Zoom in to check the image in details)
Generate params modules:
Same as the previous step but you pass the params payloads and run the command with
:paramsargumentAutoDocPackage.Requests.gen_api_spex(:params)Important! -> For actions which don't have params payload(such as
GETrequests), then remove the respective keys from theexample_data.jsonfile to avoid unnecessary Params modules generation. This behaviour is shown in the example image(showandindexkeys have been removed).
Generate operations module/functions:
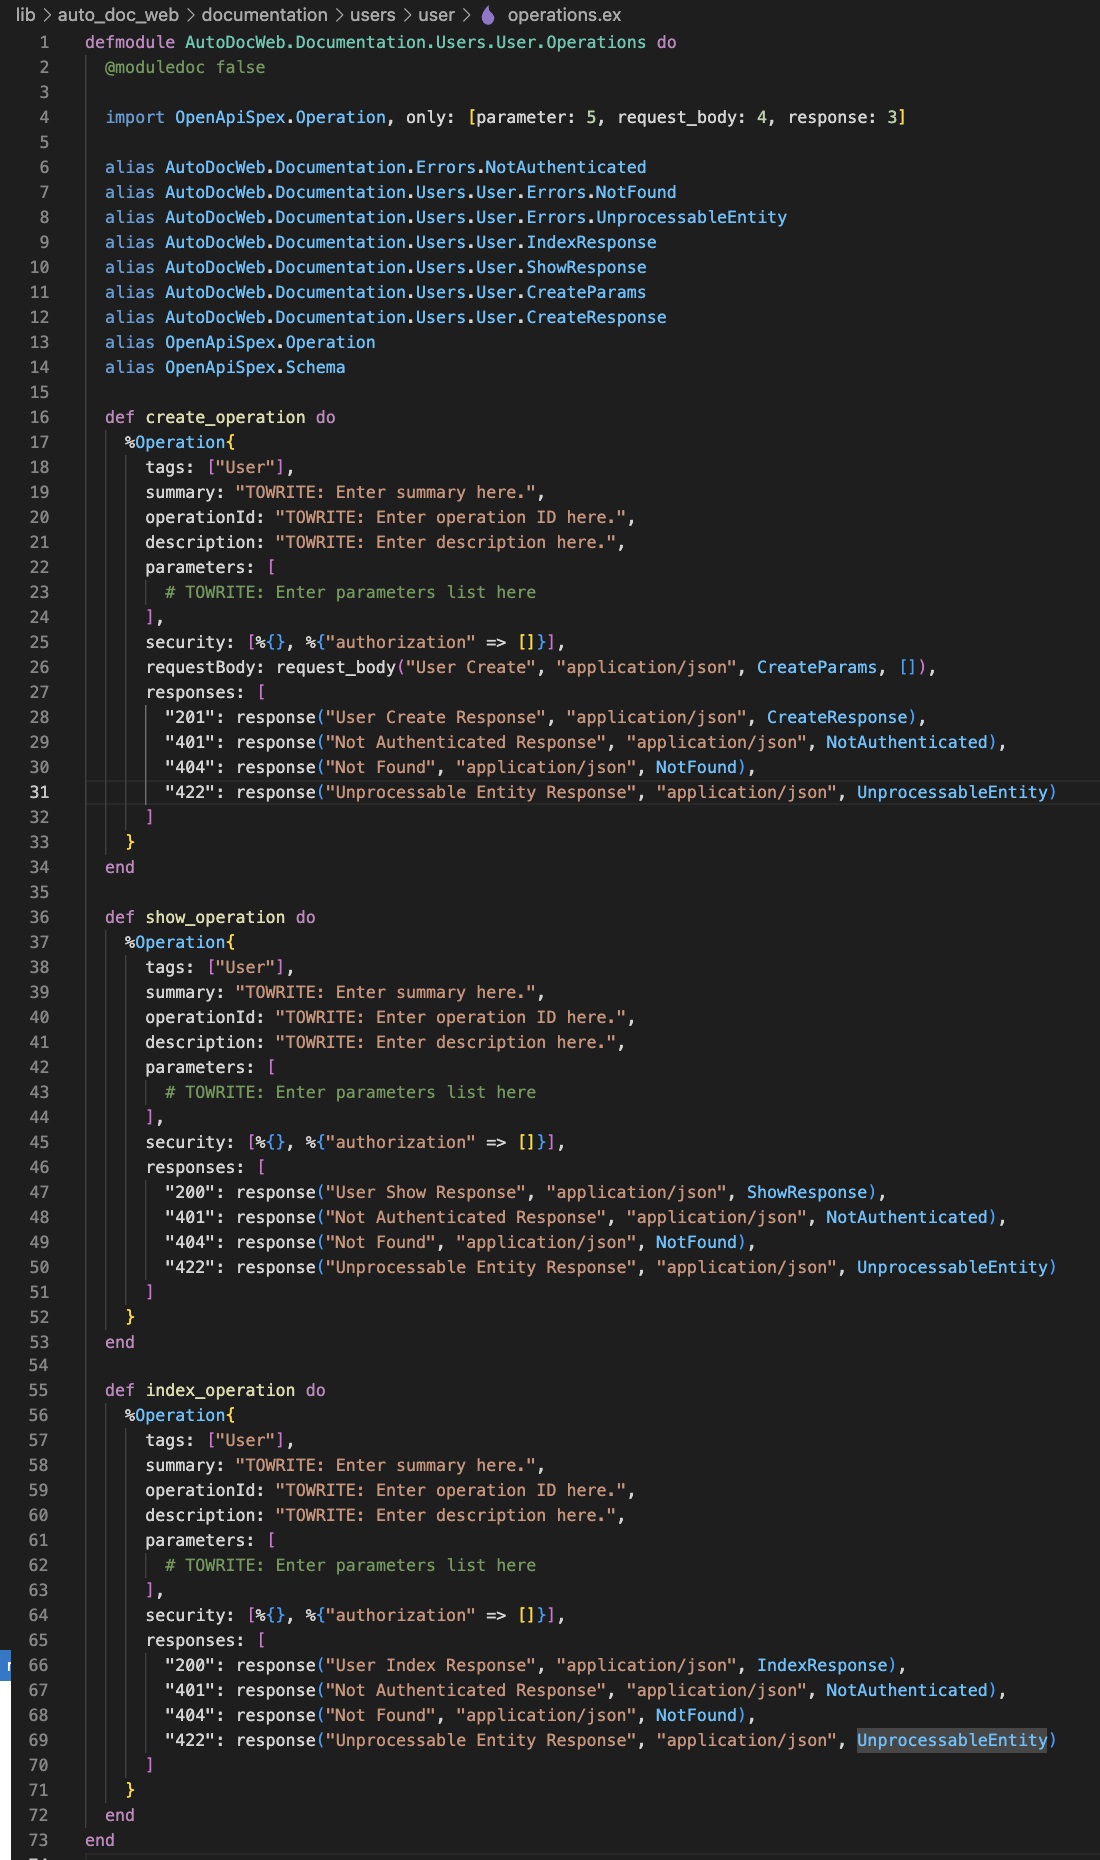
After completing the previous two steps, simply run
AutoDocPackage.Requests.gen_api_spex(:operations)You'll notice that the new operations functions have been added to the end of your
operations.exfile'sOperationsmodule and the params/response aliases have also been included.Default
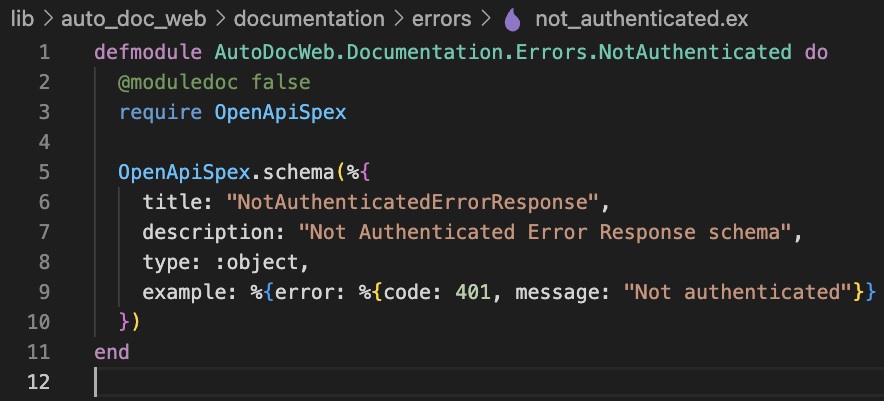
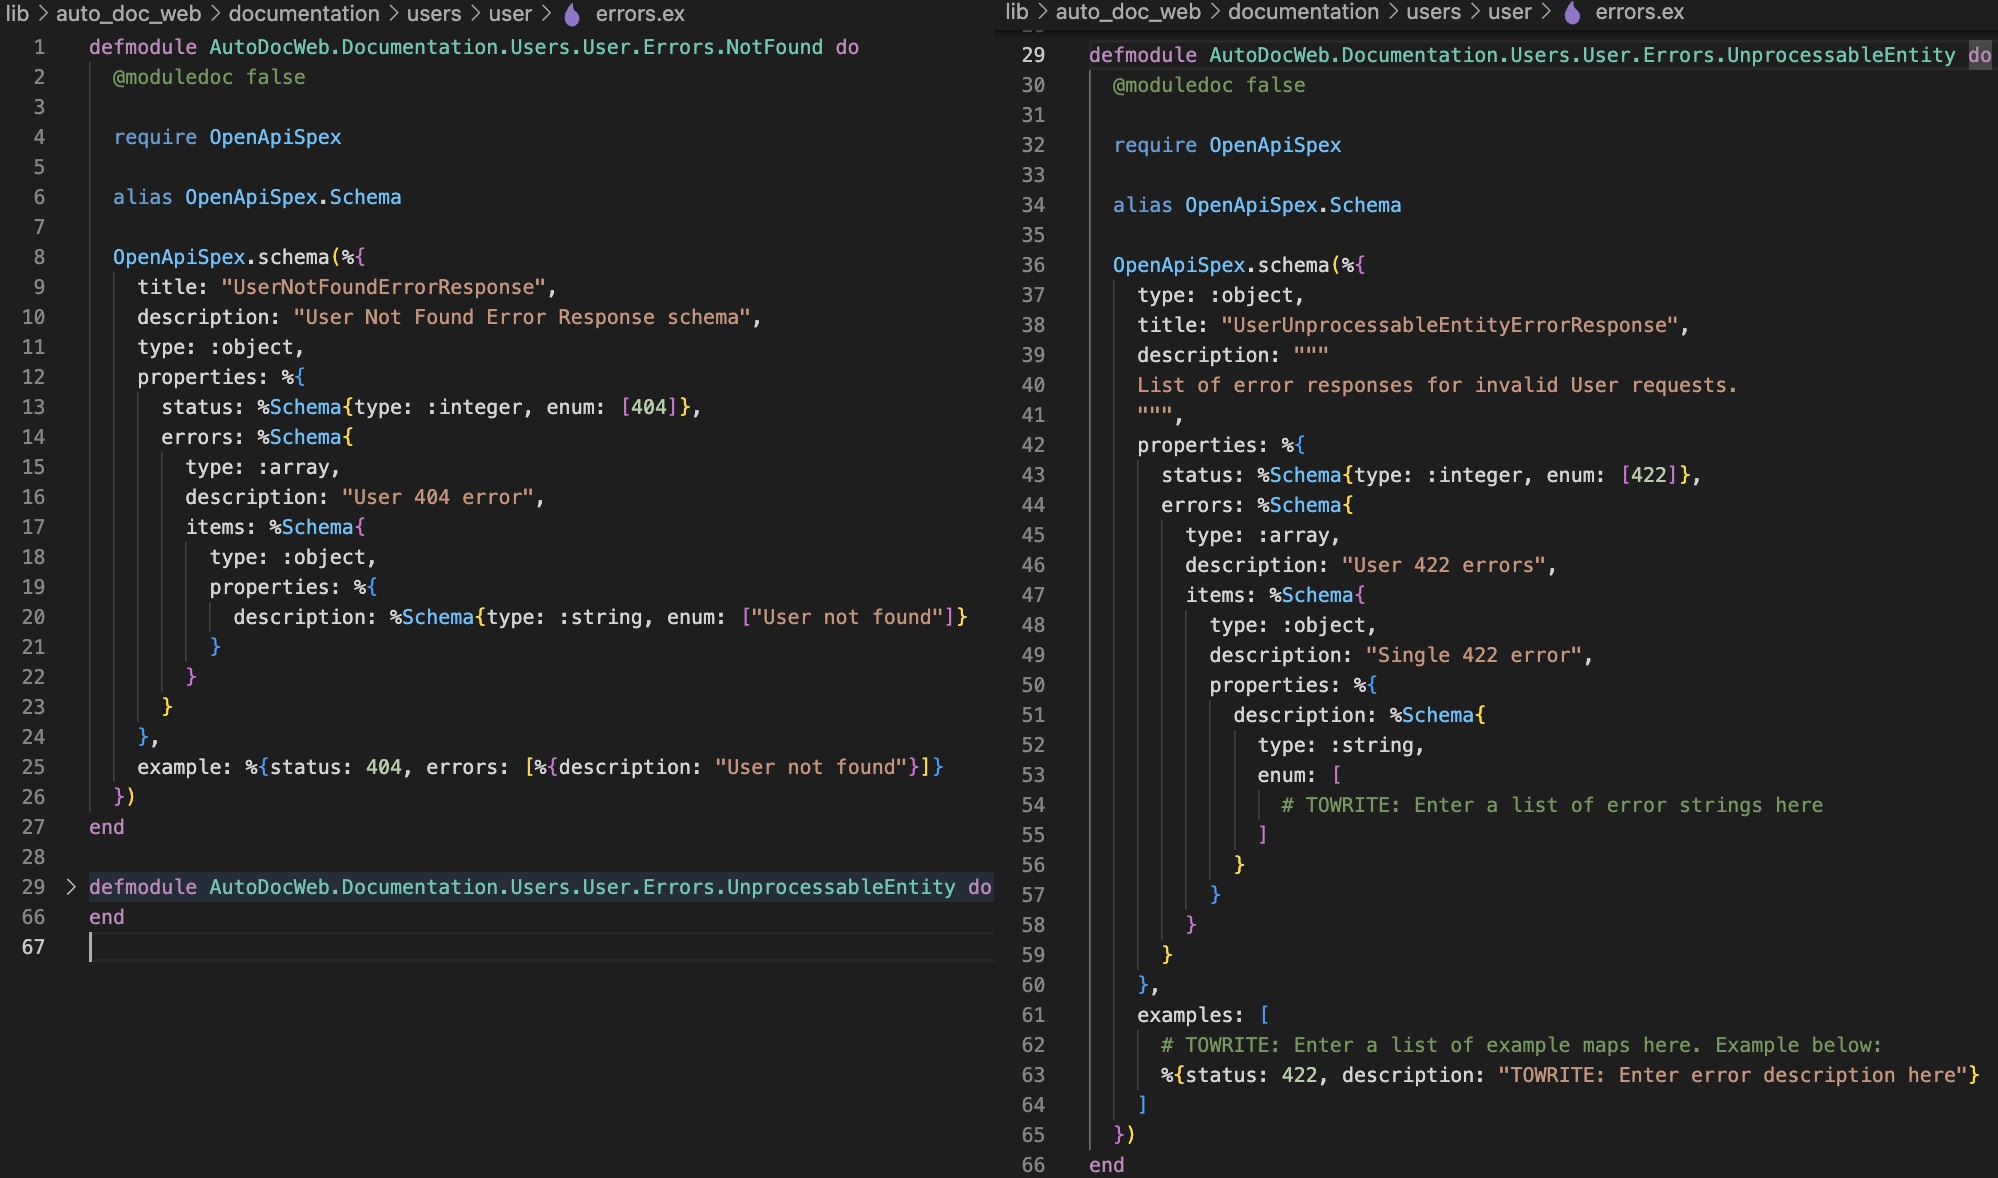
errors/directory will be created in the root of yourdocumentation/dir. It'll contain a default error file handling status401.If you don't have
errors.exfile present, a default one will be generated to handle statuses404and422which are aliased and used in the Operations module. If the file exists, nothing will happen, meaning that the content will not be overwritten.You're done! Your OpenApiSpex Documentation is completed (excluding any missing fields and description writing)
Important!
Use as detailed payloads as possible since they're the most important part of types/values generation and mapping. Anything missing in the payload in return will be missing in the generated documentation.
Descriptions are still written manually and for that case, search for the
TOWRITEkeyword and change all occurences with your custom text.If a type wasn't recognized upon generation, it'll have value of
:unknownand should be changed to the proper value manually.In params payload, if one of the main keys matches the model(schema)'s field name, its
defaultandvalueswill be mapped and also be added to the API Docs automatically.Note: It's not 100% foolproof, but we're working on improving it.
Supports Documentation versioning in the path and module in format:
your_app_web/access_type/version/...# Private V2 example | access_type = "private" ; version = "v2" documentation_path = "auto_doc/lib/auto_doc_web/private/v2/documentation" controller_path = "auto_doc/lib/auto_doc_web/private/v2/controllers/users/user_controller.ex" # Public V1 example | access_type = "public" ; version = "v1" documentation_path = "auto_doc/lib/auto_doc_web/public/v1/documentation" controller_path = "auto_doc/lib/auto_doc_web/public/v1/controllers/users/user_controller.ex"