Why? 🤷
Frustrated by the complexity
and incomplete docs/tests
in existing auth solutions,
we built auth_plug to simplify our lives. <br />
We needed a way to minimise
the steps
and code required
to add auth to our app(s).
With auth_plug we can setup
auth in any Elixir/Phoenix
App in less than 2 minutes
with only 5 lines of config/code
and one environment variable.

What? 🔐
An Elixir Plug (HTTP Middleware)
that a complete beginner can use to add auth to a
Phoenix App
and understand how it works. <br />
No macros/behaviours to use (confuse).
No complex configuration or “implementation”.
Just a basic plug that uses Phoenix Sessions
and standards-based JSON Web Tokens (JWT).
Refreshingly simple. The way auth should be done.
 Edit this diagram:
[docs.google.com/presentation/d/1PUKzbRQOEgHaOmaEheU7T3AHQhRT8mhGuqVKotEJkM0](https://docs.google.com/presentation/d/1PUKzbRQOEgHaOmaEheU7T3AHQhRT8mhGuqVKotEJkM0/edit#slide=id.g841dc8bc44_0_5)
Edit this diagram:
[docs.google.com/presentation/d/1PUKzbRQOEgHaOmaEheU7T3AHQhRT8mhGuqVKotEJkM0](https://docs.google.com/presentation/d/1PUKzbRQOEgHaOmaEheU7T3AHQhRT8mhGuqVKotEJkM0/edit#slide=id.g841dc8bc44_0_5)
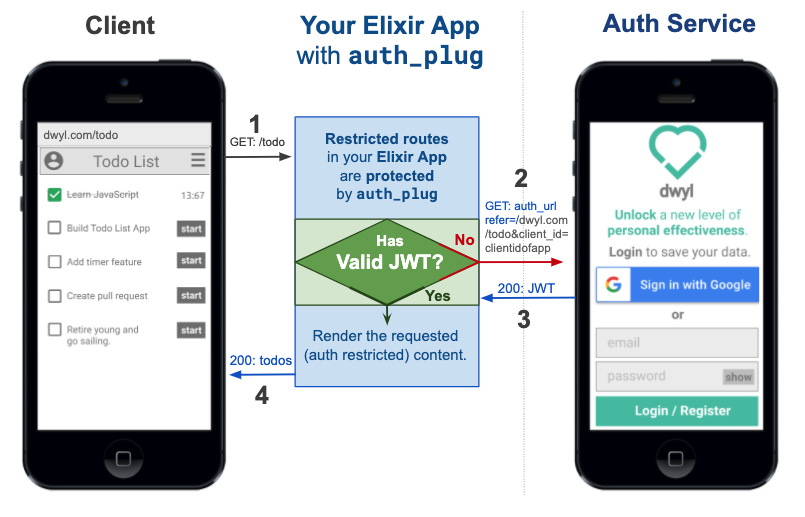
auth_plug protects any routes in your app
that require authentication. <br />
auth_plug is just
57 lines
of (significant)
code;
the rest is comprehensive comments
to help everyone understand how it works.
As with all our code,
it’s meant to be as beginner-friendly as possible.
If you get stuck or have any questions,
please ask!
Who? 👥
We built this plug for use in our products/services. It does exactly what we want it to and nothing more. It’s tested, documented and open source the way all our code is. It’s not yet a general purpose auth solution that anyone can use. If after reading through this you feel that this is something you would like to have in your own Elixir/Phoenix project, tell us!
How? 💡
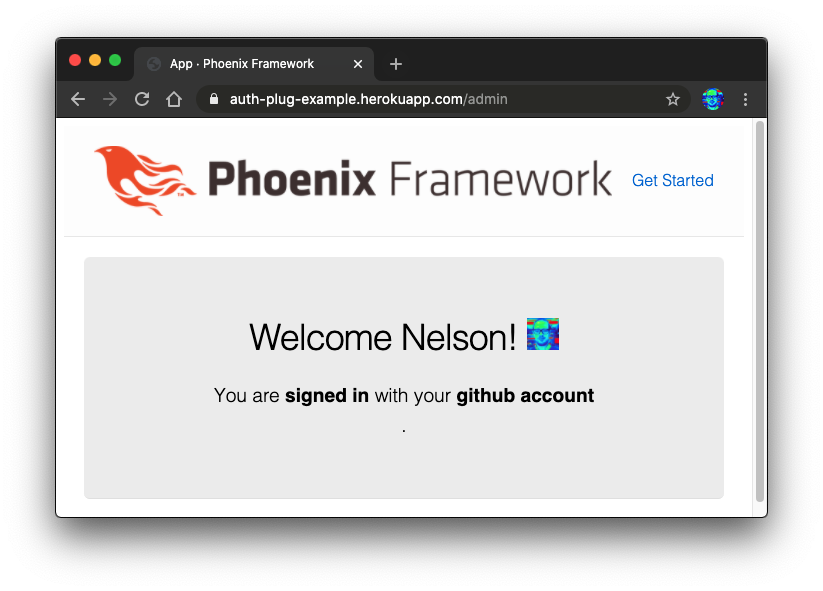
Before you attempt to use the auth_plug,
try the Heroku example version so you know what to expect: <br />
https://auth-plug-example.herokuapp.com/admin
Notice how when you first visit the
auth-plug-example.herokuapp.com/admin
page, your browser is redirected to:
https://dwylauth.herokuapp.com/?referer=https://auth-plug-example.herokuapp.com/admin&auth_client_id=etc.
The auth service handles the actual authentication
and then transparently redirects back to
auth-plug-example.herokuapp.com/admin?jwt=etc.
with a JWT session.
For more detail on how the Auth service works,
please see: https://github.com/dwyl/auth
If you get stuck during setup, clone and run our fully working example: https://github.com/dwyl/auth_plug_example#how
1. Installation 📝
Add auth_plug
to your list of dependencies in mix.exs:
def deps do
  [
    {:auth_plug, "~> 1.4.8"}
  ]
end
Once you’ve saved the mix.exs file,
download the dependency with:
mix deps.get
2. Get Your AUTH_API_KEY 🔑
Visit: https://dwylauth.herokuapp.com
and create a New App.
Once you have an App,
you can export an AUTH_API_KEY environment variable.
e.g:
2.1 Save it as an Environment Variable
Create a file called .env in the root directory of your app
and add the following line:
export AUTH_API_KEY=2cfxNaWUwJBq1F4nPndoEHZJ5Y/2cfxNadrhMZk3iaT1L5k6Wt67c9ScbGNP/dwylauth.herokuapp.comThe run the following command in your terminal:
source .envThat will export the environment variable AUTH_API_KEY.
Remember to add .env to your .gitignore file.
e.g:
echo ".env" >> .gitignore
3. Add AuthPlug to Your router.ex file to Protect a Route 🔒
Open the lib/app_web/router.ex file and locate the section:
  scope "/", AppWeb do
    pipe_through :browser

    get "/", PageController, :index
  end
Immediately below this add the following lines of code:
  pipeline :auth, do: plug(AuthPlug)

  scope "/", AppWeb do
    pipe_through :browser
    pipe_through :auth
    get "/admin", PageController, :admin
endExplanation
There are two parts to this code:
-
Create a new pipeline called
:authwhich will execute theAuthPlug. -
Create a new scope where we
pipe_throughboth the:browserand:authpipelines.
This means that the "/admin" route is protected by AuthPlug.
Note: Ensure the route you are protecting works without
AuthPlug. If in doubt simply comment out the linepipe_through :authto check.
4. Attempt to view the protected route to test the authentication! 👩💻
Now that the /admin route is protected by auth_plug,
attempt to view it in your browser e.g: http://localhost:4000/admin
If you are not already authenticated, your browser will be redirected to: https://dwylauth.herokuapp.com/?referer=http://localhost:4000/admin&auth_client_id=etc
Once you have successfully authenticated with your GitHub or Google account,
you will be redirected back to localhost:4000/admin
where the /admin route will be visible.

That’s it!! 🎉
You just setup auth in a Phoenix app using auth_plug!
If you got stuck or have any questions, please open an issue, we are here to help!
Optional Auth
The use case shown above is protecting an endpoint that you don’t want people to see if they haven’t authenticated. If you’re building an app that has routes where you want to show generic content to people who have not authenticated, but then show more detail/custom actions to people who have authenticated, that’s where Optional Auth comes in.
To use optional auth it’s even easier than required auth.
Open your lib/app_web/router.ex file and add the following line
above the routes you want show optional data on:
pipeline :authoptional, do: plug(AuthPlugOptional, %{})
e.g:
/lib/app_web/router.ex#L13
Then add the following line to your main router scope:
pipe_through :authoptional
e.g:
/lib/app_web/router.ex#L17
That’s it now you can check for conn.assigns.person in your templates
and display relevant info/actions to the person if they are logged in.
<%= if Map.has_key?(@conn.assigns, :person) do %>
  Hello <%= @conn.assigns.person.givenName %>!
<% end %>
e.g:
/lib/app_web/templates/page/optional.html.eex#L2-L3
Try it: http://auth-plug-example.herokuapp.com/optional
Documentation
Function docs are available at: https://hexdocs.pm/auth_plug. <br />
As always, we attempt to comment our code as much as possible, but if anything is unclear, please open an issue: https://github.com/dwyl/auth_plug/issues
Available information
By default using the dwylauth.herokuapp.com authentication service,
auth_plug makes the following information available in conn.assigns:
jwt :: string()
person :: %{
  id :: integer() # This stays unique across providers
  auth_provider :: string()
  email :: string()
  givenName :: string()
  picture :: string()

  # Also includes standard jwt metadata you may find useful:
  aud, exp, iat, iss
}
Recommended / Relevant Reading
If you are new to Elixir Plug, we recommend following: github.com/dwyl/elixir-plug-tutorial.
To understand JSON Web Tokens, read: https://github.com/dwyl/learn-json-web-tokens.